Looking for a healthy, budget-friendly, and dairy-free milk alternative? You’re in luck! Oat milk is not only delicious but also incredibly easy to make. In this guide, we’ll walk you through the steps to make oat milk at home, using simple ingredients you probably already have in your kitchen.
Whether you’re vegan, lactose intolerant, or just curious about plant-based milk, homemade oat milk is a creamy, customizable option that’s perfect for coffee, smoothies, baking, and more.
Why You Should Make Oat Milk at Home
There are many reasons to make oat milk at home rather than buying it from the store:
-
Healthier – No preservatives or additives
-
Cheaper – Costs less than store-bought alternatives
-
Customizable – Adjust the sweetness, thickness, and flavour
-
Eco-friendly – Less packaging waste
Best of all, making oat milk takes just 5 minutes and requires no fancy equipment!
🛒 Ingredients You’ll Need
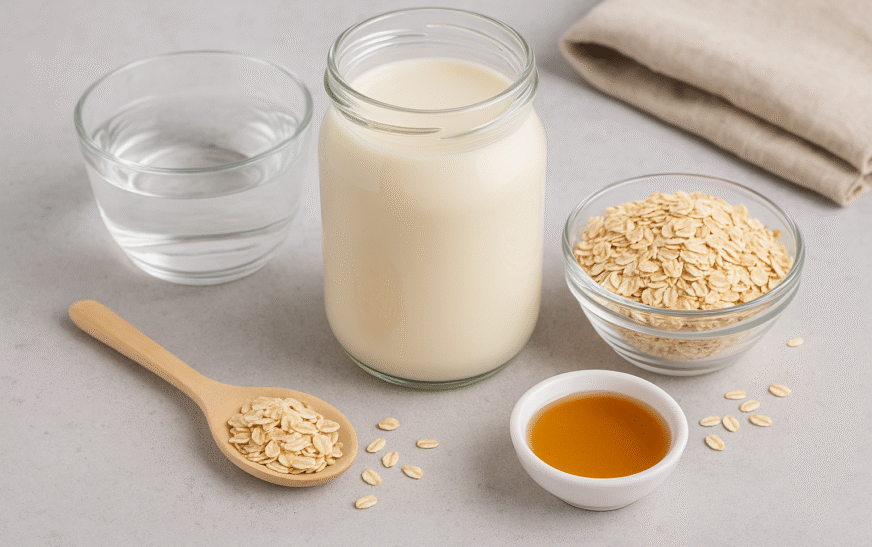
To make oat milk at home, gather these simple ingredients:
-
1 cup rolled oats (gluten-free if needed)
-
4 cups cold filtered water
-
Optional:
-
1–2 teaspoons maple syrup or honey (for sweetness)
-
1/2 teaspoon vanilla extract
-
A pinch of salt
-
🥄 How to Make Oat Milk at Home — Step-by-Step Guide
Making oat milk at home is easier than you think. Follow these steps:

Step 1 — Rinse the Oats
Start by rinsing the oats under cold water for 20–30 seconds. This removes excess starch and helps reduce sliminess in the final milk.
Step 2 — Blend
Add the rinsed oats and cold filtered water to a high-speed blender. Blend on high for 30–45 seconds. Don’t over-blend, as this can make the milk too thick.
Step 3 — Strain
Strain the mixture using a nut milk bag, cheesecloth, or fine mesh strainer into a clean container. For best results, strain twice to remove all oat pulp.
Step 4 — Flavour (Optional)
Add your sweetener, vanilla extract, and a pinch of salt if desired. Stir well and refrigerate.
🧊 Storage Tips for Homemade Oat Milk
Once you’ve learned how to make oat milk at home, you’ll want to store it properly:
-
Keep in an airtight glass jar or bottle
-
Store in the refrigerator for up to 5 days
-
Shake well before use — natural separation is normal
Pro Tip: Don’t throw away the leftover oat pulp! Use it in pancakes, muffins, or smoothies.
☕ Uses of Homemade Oat Milk
Your fresh oat milk can be used in many ways:
-
In coffee or tea
-
For baking (cakes, pancakes, muffins)
-
In cereals or overnight oats
-
In smoothies or protein shakes
-
As a base for creamy sauces or soups
Since you can control the consistency, you can make it thinner for drinking or thicker for coffee creamers.
🥣 Common Mistakes to Avoid When You Make Oat Milk at Home
-
Over-blending – Leads to a slimy texture
-
Not rinsing oats – Results in gooey milk
-
Using hot water – Always use cold water to avoid starch release
-
Skipping double strain – Leaves grainy bits in your milk
By following the steps properly, you’ll get smooth, delicious oat milk every time.
📌 Conclusion
Now you know exactly how to make oat milk at home—and why it’s worth it. It’s fast, affordable, healthy, and tastes amazing. You can customise it to your liking, save money on store-bought alternatives, and enjoy fresh oat milk whenever you need it.
Whether you’re adding it to your morning coffee, using it in your favourite recipes, or just drinking it straight, homemade oat milk is a smart and satisfying choice. So grab your oats and blender—your creamy, dairy-free milk awaits!
In addition to being a great dairy substitute, oat milk is also gentle on the stomach and suitable for people with nut allergies. Its smooth texture and mild taste make it ideal for both sweet and savoury dishes. If you’re on a plant-based diet or simply want to reduce your dairy intake, this is one of the easiest recipes to start with.
The best part? Once you get the hang of how to make oat milk at home, you can experiment with different variations—add cinnamon, turmeric, cocoa powder, or even dates for extra flavour and nutrition.
Making your own oat milk is not only a healthy choice but also a lifestyle upgrade. You’re taking control of what goes into your food, minimising waste, and embracing sustainability. So go ahead and give it a try—once you taste your homemade oat milk, there’s no going back!